05 November 2011

A growing patch of flowers

So now there are 16 Sunflowers.
And they are looking good, even if I say so myself :-)

02 November 2011

The bright and the bold


More Sunflower. I like the light rays around the sun-face on this one. I liked the dark orangey ones too, but I think I like this one better.
The yellow fabric I've used for the middle bits are the - now almost extinct - remnants of one of the first F/4s of batik I bought. It cost an arm and a leg, but the colour was too lovely for me to resist. It still is. Love those saturated, unafraid, yellows

29 October 2011

Auditioning backgrounds - part 2

Well, after all the song-and-dance on this blog about what background to choose for my Sunflowers, I bit the bullet, and now I have two options, none of which have been shown before.

Option 1 : Lots of different blues.

Option 2 : A fabric bought the weekend before last, which actually has all the nuances of greens that I use in the flowers proper, and a few more, plus some yellows and blues too, and a big leaves pattern, which will probably be unrecognizable when cut into pieces.


I think I'll go with Option 2, the fabric of the many greens, for the main quilt, and with Option 1 for the 'Reject' quilt.
And no, they are not properly rejected blocks. As was the case with the Passacaglia, there will be blocks that doesn't work with the rest, and the ones that stick out the most will be getting a multiple-blue background and will - eventually - form a quilt of its own ... hopefully a quilt smaller than the one with greens in the background :-)

26 October 2011

All things bright ...

Well, this one certainly is bright.
Sunflower # 15, for your perusal and (hopefully) enjoyment. The fabric I've used for the outer diamonds doesn't work too well, but ... it stays !

22 October 2011

Gorgeous Hexagons

This past week-end, I spent a wonderful couple of days in a vicarage in Jutland (Louns if you want to look up the place on Google Maps or the like).One of the things we did was getting DFreind to the point where she can finish her second quilt-top. Yes. Her second.
It is made using the 1" shapes from Inklingo Collection # 1 (a sold-out CD), and is looking spectacular. And yes, you can still get most of the shapes here in downloadable collections, viz. the 1" hexagon collection and the 1" diamond collection. The only shape used here, which is no longer available (unless you have Collection 1) is the 1" elongated hexagon.

The picture does not do the colours justice, just so you know. It is far more vibrant in real life than it is here. I can hardly wait for it to be a finished top, so we can send it off to a quilter :-)

19 October 2011

Still shining


Sunflower # 14.
And I'm still enjoying myself hugely. And I like the colour grading from pink, via orange to yellow. Would love to have the individual shapes show up more clearly, but ... you can't have both a gradation (?) and a clear difference.

I do fear, however, that I need to start printing and adding the backgrounds soon, just to get a better impression of what the finished article will look like.

... but I think I'll make just one more Sunflower before doing so :-D

15 October 2011

Auditioning backgrounds

Well, "That Perfect Background" hasn't worked out. Can't find more of it anywhere in the world, so I'm looking into alternatives. And this is where a digital camera is a true blessing, because one can place the blocks, take a picture, and move on to the next suggestion.

Here's a fabric that I just got in. Ordered it ... just because. I will need to order more (and hurry up about it) if I want this.

And this is the fabric I ordered, because it looked close to "That Perfect Fabric" while on the monitor. Unfortunately, it turned out to be much lighter in real life than it was on the picture on the screen. It doesn't happen often, but it happens. Looks ... ok, I guess, but rather light. The good thing about it is, that I have enough of this fabric :


And then something completely different : What about a bright, warm, yellow background ? If this is what I end up deciding upon, I need to order more, and - again - need to hurry up about it.

I'm holding out a bit, though. I'm going with a DFreind to a place which never has a sale, but has a warehouse full of fabrics tomorrow. She might have something. I hope so. If not ... I'll just have to make an executive decision and stay with it.

12 October 2011

A Baker's Dozen of Sunflowers

Another attempt at 'doing something' with the huge centre of the 12" Sunflower block
This time, I've dug out some patterns I made ... what ... 8-10 years ago. Applique. Some of them are actually perfect (and the perfect size) to use as Sunflower centres.

And I like this one.

What I did was :
Print the Sunflower circle on the yellow fabric.
Draw the applique-pattern on the back of the green fabric (and since it is a batik, the 'back-front' thing is not an issue. At all).
Layer so the yellow fabric is on top of the green; both with right sides up, and so the printed circle aligns with the drafted circle (a light-box or a window with day-light on the outside are great helps here).
Baste from the back.
Applique !

Stitch the Sunflower as usual.

Finished.

I like this one. I'll dig through my old designs again. I know there are at least two more circular designs in there, that might, just might, be appropriate to use for a Sunflower center.

08 October 2011

Printing with too little fabric

Occasionally (frequently), I find myself just short of the desired size of fabric when I want to print something with Inklingo.

Example : I want to make some small Broken Dishes blocks. For that, I need HST.
What is more, I would love to have them finish at 3", because then I can make them work with the 6" format that I mostly use for my block-experiments.
Now, to print a total of 8 HST, each 1.5" with Inklingo, I need a piece of fabric which is 5.25 x 5.5", BUT, I would so much like to use some (prewashed) 5" charms (which, after washing, are then more like 4.75 x 5").

Here's what I do :
Cut the freezer-paper 5.5" square.
Set the printer's Custom-size to 5.5" square

On the plastic-side of the freezer-paper, print the desired shape. In this case, 1.5" HST in Layout 1. Print it with colour 00. It really doesn't matter if you can see the actual print here. What is important is, that you can see the rulers that are on top of and to the left of the print proper.

(click on picture to see more clearly ... and yes, I can barely see the 00-colour print on this sheet of paper. I can, however, see the ruler-lines fairly clearly).

Take the 5" square.
Position it so that it just (barely) covers the straight line of the printed (and visible) ruler. (again, click on picture if you have trouble seeing what I mean)
Iron in place.

IF your iron gets slightly gunky from this exercise, take a brown paper-bag (or another uncoloured piece of scrap-paper), place it over the edge of your ironing-board, and run the sole of your iron over the edge a few times. This will do away with most gunk on the sole of your iron (trick learned in clothes-construction class; it works when you want to remove remnants of fusibles like vlieseline or steam-a-seam from the sole of your iron).

Print normally ! staying with the 5.5" user-defined / custom-size of setting.

As you can see, the fabric just (just !) covers enough of the print to give me both cutting- and stitching-lines for all 8 HST.


The general principle can be used with any (custom) size paper. Set your setting to the size paper you need, and you can (just) make do with a piece of fabric which is up to 0.5" smaller on one or both sides.
It is a particularly useful trick to do, when you - like the case is in this example - have a certain size pre-cut, and need just that teeny little bit more fabric to make it really work.


... oh, and my printed 5" charms ?
They are made into Broken Dishes and Pinwheel blocks, and I'm doing them as Leaders-Enders (thank you for the term, Bonnie Hunter)
And yes, in the fullness of time, there will be enough for a quilt :-)


... in the fullness of time :-)

05 October 2011

Nicely Neutral Sunflower

Or : Sunflower # 12.
I know I have 'always' said, that fuchsia and chartreuse are neutrals. So here it is. The nicely neutral Sunflower, using (from the outside and in) : chartreuse / lime, orange/pink, fuchsia, turquoise, and orange!
And with a fussy-printed centre too :-)

There is one full sun left on the F/4 of Sun-fabric used in the centre here, I think I *need* to make another one, with the fussy-printed centre, but with light-yellow inner triangles, to match the light-yellow rays of the sun on the fabric ... and even though this block seriously kicks ... donkey. It kicks donkey, the turquoise really stands out up there on the wall.
... but I might just return to it anyway :-)

01 October 2011

Knitting in a foreign language


And so it is October, the weather is getting colder, and I'm knitting again.

I've started Susan Pandorf's 'Evenstar' shawl. And I blame Martha. (Martha carries the blame for many beautiful and wondrous things that are in my life, so I'm sure she'll shoulder this one too).

Lace-knitting without a multitude of reapeats is a challenge on its own. To do lace-knitting, where the pattern is written in a foreign language adds a new dimension to the challenge (and yes, to me English is a foreign language). There are some of her abbreviations that I can simply not wrap my head around, and have spent quite some time on Ravelry and google to try and find out what they were.

Thank God for YouTube, and generous people who share how to do things. Seeing a stitch is essential when you cannot understand the written directions.

ANYway, the Evenstar shawl is well started, using silk-thread (from Blue Moon Fiber arts for which the pattern is written), in a lovely variegated blue. Silk isn't very forgiving to knit, and since the project has just been started, it isn't in any way blocked yet. I hope you can still see a bit of the loveliness.

The pink thread (you can see it clearly on the small picture to the right), is a life-line. Amazing concept when knitting lace in the round :-) And again, thank god for YouTube :-)

And yes, I know one usually doesn't blame someone for that which is good, but since many of the good things Martha has brought into my life are quite addictive, I think that blame is a good word :-)

28 September 2011

Here comes the Sun(flowers) 11

After loads of double Sunflowers, with and without the home-made middle bit, it's time to return to a single one. BUT with a fussy-cut / printed centre.

And yes. It works. Sort of.
The outer triangles are not the perfect green for this combination, BUT, it will work well enough, when seen with the others ... I hope.
I'll have to see what else I've got on the shelves that would work for fussy-printing.

24 September 2011

That extra bit for the Sunflower

I've had a question : That extra bit for the Sunflower, the 'small outer-triangle, large inner-triangle combo' thingie. How have you drafted it.

Easy-peasy.

Use 2 sheets of freezer-paper.
From the 6" Sunflower collection, print a sheet of Outer Triangles
From the 12" Sunflower collection, print a sheet of Inner Triangles

Make sure your sheet of freezer-paper is big enough to yield 16 bits. I just printed on a Letter size (8.5 x 11") piece of freezer-paper. That got me too many bits, but that's ok.

Cut out 16 of each shape leaving the Seam Allowance in place.

On the 12" Sunflower Inner Triangle bits, cut away the bottom (curved) seam allowance.

Iron the outer-triangle bits on top of the inner-triangle bits (see picture on the right)

You can leave the seam-allowance on your templates, or you can cut them away. It all depends on how you prefer to prepare a block with freezer-paper rather than Inklingo.

I chose to leave the seam-allowance on. That way, I can place the composite templates right up to each other, and know I have the seam-allowance in place.

If you do that, you - again - have two options :
Draft the stiching-line on the fabric-piece, or not draft the stitching-line.
If the rest of your Sunflowe is prepared with Inklingo, you do not need a stitching-line, because there are stitching-lines on every piece it is going to be joined to. Just peel off the paper and you're ready to roll.


BUT, some of you might want a stitching-line anyway, in spite of it being unneccesary. I would suggest that you draft that before peeling off the freezer-paper.
I would further suggest, that you place your ruler so the 0.25" mark is just outside of the paper. Just. Not visibly away from it, just ... just outside.
When you draft your stitching-line (using a fine-line pencil), it will be placed right :-)
Click on the picture (right) to see it in a larger size, you will be able to see what I mean.

... but really, you don't need that stitching-line. You have perfectly good stitching-lines on the other pieces, and since you've used Inklingo to prepare everything (including the templates for this bit), it will all fit together nicely.

21 September 2011

Here comes the Sun(flowers) 10

Green inner diamond. Check.
Homemade middle bit. Check.
.... hmmmm .....
Other than me thinking that the fabric I have chosen for the outer (large) diamonds, is not really suitable for this, I like it.
Maybe one could use the fabric better ?That'll be the next one to try.

17 September 2011

... hanging on the wall

(sung to the tune of "Ten Green Bottles")
9 Sunflowers, hanging on the wall
9 Sunflowers, hanging on the wall ...

Picture is a bit dark, they are brighter in real life, but they are up there on the wall, brightening my play-room every day. And I think this is a case, where more is more. Don't you ?
And I've been looking into background-fabrics. A (little) while back, I ordered some F/4s and found what I believe is 'that perfect blue' for setting them. Sadly, it is a batik from ... ooooh ... 2005 (? I think), and I thought it was no longer available anywhere in the world.
So, I asked on a list, and someone found it at the Blue Bamboo on-line shop ... only - sadly - it turned out to be sold out. At the Hingeley Road quiltshop, all but a F/4 was sold out too.
SO, Google didn't return any useable results; quiltshops.com didn't return any useable results; eBay didn't return any useable results.
So this is my last ditch effort. The fabric is an (ancient) Hoffman batik; E137 Sea Breeze, and looks like this :

The above is a F/8 of the fabric, and the dark splashes are coppery, not really brown or red. Anyone ? I need (at least) 3.5 yards.

15 September 2011

Only 100 days to Christmas !

Ladies (and gentlemen), I have an announcement : This year, Christmas day will be December 25th.
Yes. I know it is shocking news, and that it takes you completely unprepared.

There is worse : December 25th is only 100 days away.

If you want a stress-free (or just stress-reduced) Christmas, this is the perfect time to start doing what you can do in advance.

If you are planning to make hand-made Christmas-gifts this year, you are too late.
Sorry, but there it is. It will take (at least) twice as long as you think it will, and you will not have the time to work 8 hours a day on those projects for the next 3 months.
Face it !
Pick one of the Christmas-Present-Projects you have already started. Yes. Just one ! Focus on that. Take it all the way to the finishing line. Once that project is finished is time enough to pick up and focus on the next one.

Procrastination is a fine art, but it ain't fine if it stresses you out.

14 September 2011

Here comes the Sun(flowers) 9

SO, double Sunflowers with or without the hand-made middle bit work for me.

But there is still a bit of 'shaking up' I can do.

Sunflower # 8 is - and this is one of the small ironies of life - not green enough :-)
And there is (at least) one placement of green I haven't tried yet.
So that's what is being tried this week : Green inner diamonds.

Do I like it ?
Well ... the inner Sunflower seems almost a separate flower, and I'm not sure I like that.
The centre 'spokes' stand out very clearly, and I think I like that.
I will try to mix 'green inner diamonds' with 'home-made middle-bit' and see if that works better.

That aside, yes, I like the block ... but then, I have liked all of my Sunflowers so far :-) And yes, I can see the 'faults' of a block and still love it. Lesson learned from Dear Jane :-)

On to the next one !

11 September 2011

I have fabric !


The Dear Jane collection from Windham.
Lovely, lovely fabrics. Just the kind of cotton-therapy that one needs on a day like this.
And yes. I do remember.
All too well.
But I don't feel the need to add my voice to the throng. Read your newspaper today, or watch the many, many memorial-programs on your telly.
Then go hug the stuffing out of someone you love, and do something which makes you happy.
I'm patting fabric today :-)

07 September 2011

Here comes the Sun(flowers) 8

SO, I liked the double Sunflower with 'homemade' middle sort-of diamonds (made from 6" outer triangles and 12" inner triangles), and decided to make another one. This one.

In conjunction with the other Sunflowers I've made (so far), the outer diamonds are very, very bright (and light), and the block sort-of stands out, but in and of itself, it is a great-looking block (at least to my eyes).
04 September 2011

There must be something in the water

... there really must be. Something in the water. Or the air. Whatever.
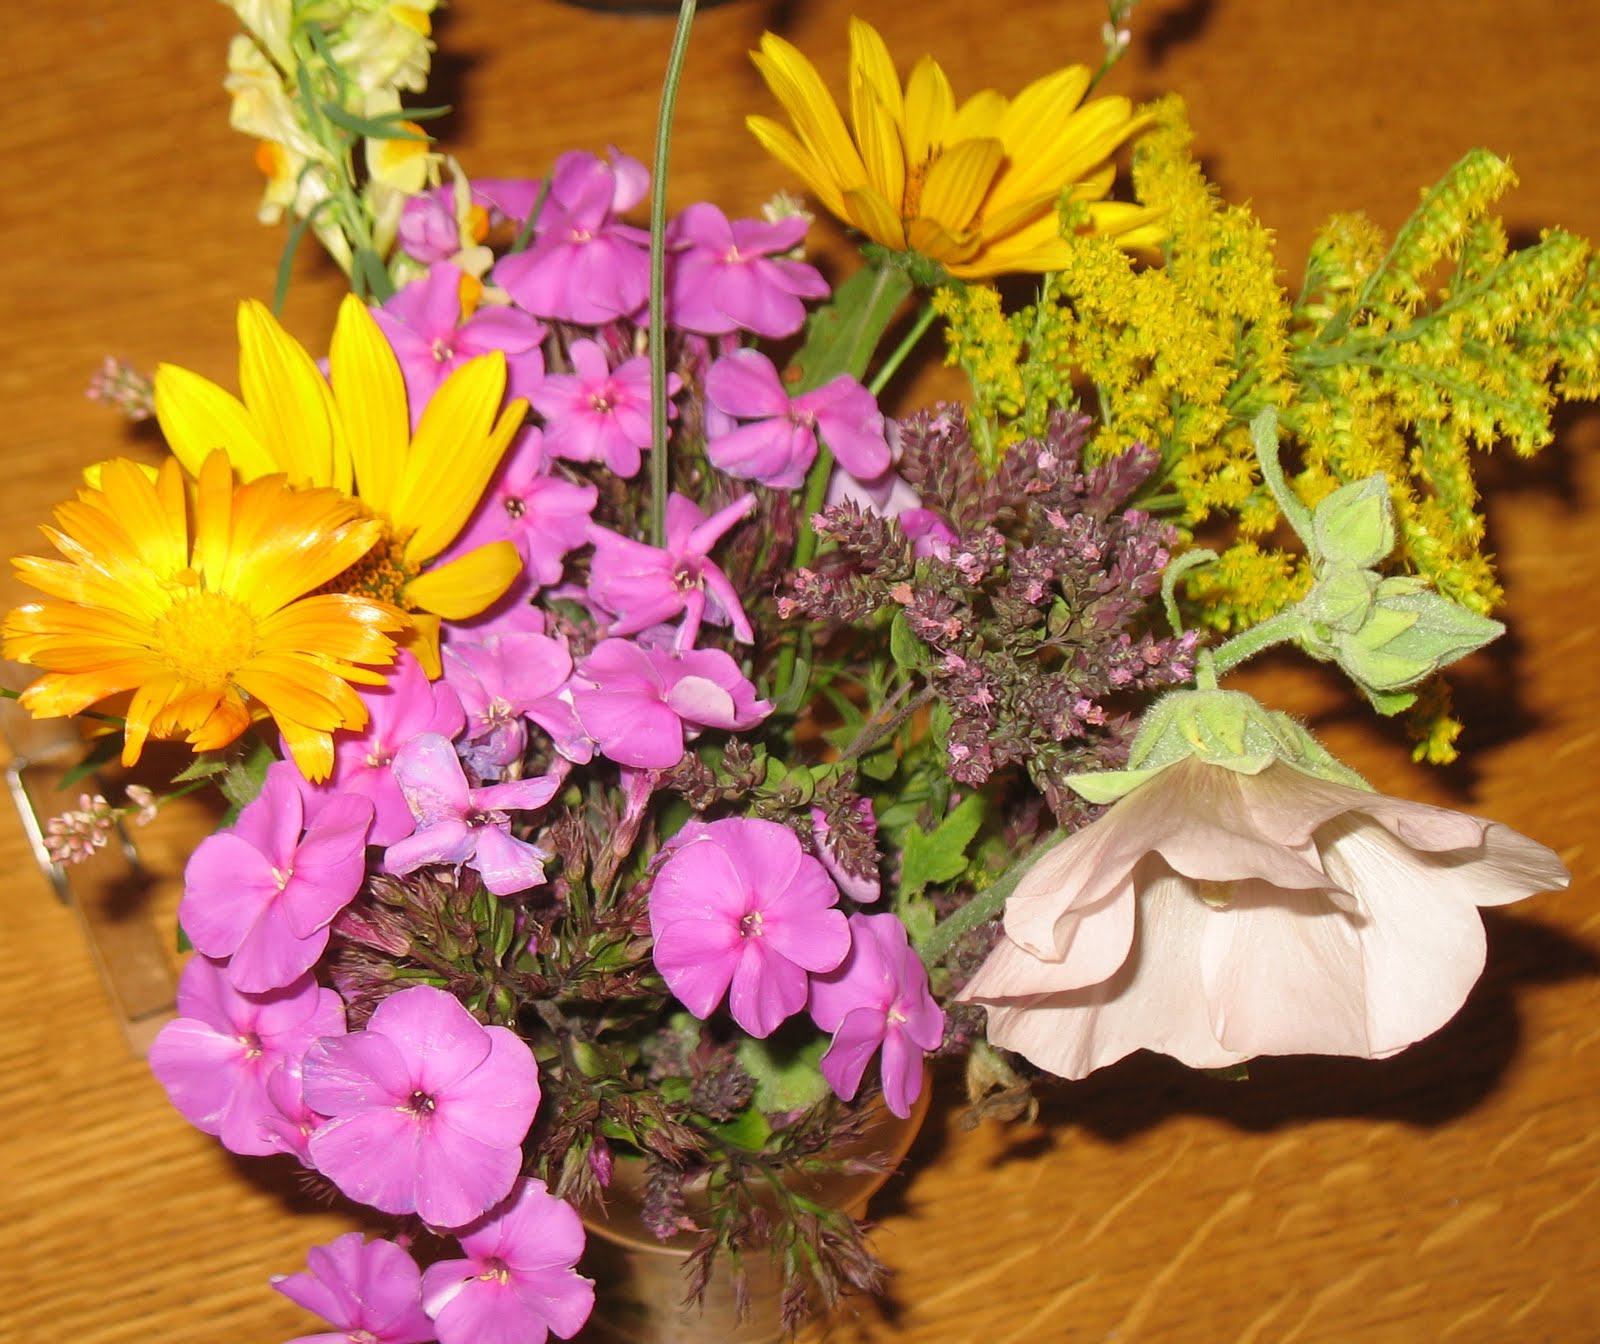
Because these colours turn up everywhere :-)
We had some freinds over for dinner yesterday, and she had scrounged up some of the last flowers in the garden. A perfect match for my Sunflowers :-)

31 August 2011

Here comes the Sun(flowers) 7

Results on Sunflowers so far :
I like the double Sunflower.
I do not like having a big 'empty space' in the middle, the kind I get when I do a 'single Sunflower' in the 12" size.
I like it that there isn't too much green in the flowers.
What about making the outer triangle on the 6" sunflower and the inner triangle on the 12" sunflower of the same fabric ... and then aligning them ... and then doing away with the seam, by making my own 'middle diamond' template.
Done :

And frankly, even though there isn't quite enough contrast in there, I think this is very close to 'That Perfect Sunflower' ... at least in the double sunflower category. Never fear, though, I'm going to plod on and continue to experiment with this block for a while to come.

28 August 2011

My machine and I

You who read this blog on a regular basis will know that I like hand-work.
Any kind of hand-work really.
With a preference for what my freind Diane in NY calls 'DLS' (Dinky Little Sh ... Stuff).
BUT, I do have a sewing-machine. As a matter of fact, I have 3. I have a hand-crank, that DH salvaged from a dump, took home, gave some TLC and now it purrs on like nobody's business.
Then there is the Viking / Husquarna. It was top-of-the-line 22 years ago, it isn't anymore, but it still goes strong.
Finally, there is the tiny Janome, which is what I tend to use mostly. It is small, doesn't have a zillion different stitches, but it works.
... most of the time.

Now. I like my machines well enough. Yes. All of them. And in broad general, they are not too averse to me. We're not like BFF, or intimate in any way (remember my hand-work preference), but ... generally we can work together well enough.
And then, one day, we couldn't.
The little one just stopped. Wouldn't budge.
And, after some work, I understood perfectly why :

Exhibit A (on your right) shows the compact used-to-be-fluff I picked out of the spool-house. Using tweezers. It was stuck fast and really hard.
There is nothing fluffy about it. The spool is there to show just how much there actually was.

After I had carefully lifted all of that from the spool-house, I 'stole' DHs canned air, and gave it a good blow-through as well.
And now the little Janome purrs on again, and harmony has been re-established in the little home.

The moral of the story :
Clean your machine.
If you are on intimate terms with yours, you probably know already, and don't need my reminder, if you are more like me, and not all that close with your machine, now would - probably - be a good time to get out the tweezers, the canned air, a bit of patience, and get the fluff out of the spool-house :-)

24 August 2011

I blame the Van (aka : Sunflowers 6)

.... or "Here Comes the Sun(flowers) 6"
A young couple down the street have bought a "new" van / car / whatever that kind of vehicle is called. Actually, it is bordering on antique. It is most definitely a vintage car. An around 1968 vintage. For a long time, I thought it was a prop for a movie but nope, it's an original and they love it.

The paint-job and the stickers, are originals, and while it has never been to Woodstock, it definitely wanted to be. So ... this is where I put the blame for the Sunflower of the Week.


See the similarities ?


And then a few notes on this week's Sunflower :
The double Sunflowers I've made so far have had the outer triangles on the 6" bits and the inner triangles on the 12" bits, staggered, so the point of the 6" diamond was in the middle of the 12" triangle (no, diamonds are not 6" and triangles are not 12", but .... you know what I mean, and if you don't this whole post will probably be gibberish anyway). This time, I have aligned them. Outside triangles on the 6"-block-circle, and Inner triangles on the 12"-block-circle have been aligned.

And apart from the fact, that it looks terrifyingly 68'ish in the colours I have chosen (and I blame the constant presence of 'the van' just outside our house for those colours), I like the alignment. I really do. Another thing to experiment with. I also think that the dark green around the edge makes it a lot less garish than it could have been.
And isn't it great, that I seem to be doing one Sunflower every week :-) My own personal Block-Of-the-Week challenge. Leaves me room to experiment with other stuff too, and still feel like I'm advancing on the Sunflower project. Feels good, actually :-)

And, just for the record, I like my 'hippie Sunflower' a lot :-D

21 August 2011

It's Blackberry time

Not the electronic device. The edible sort.

DH, DSon and DSon's freind have been picking blackberries, and had a lovely afternoon turning the berries into preserve and squash / syrup (for diluting with water and drinking ... soft-drink, you know).
And here are the pictures to prove it :


Setting out (some of the) containers for the preserve / jam.


The almost boiling cauldron


Cleaning the edges of the glass with a cloth dipped in boiling water.


Putting on the lid (deep concentration)


The first 4 glasses. More were made. I think we ended up with 12 liters of squash/syrup/juice and about 20 glasses of jam / preserve. DS's freind is going to take about half home. DH has enough blackberries picked to make another batch the same size.

... DD and I will enjoy consuming them.

Dissing ms Aloi

Have you read ms Aloi's rant about we who knit, stitch and blog ?
Well ... just in case you haven't, follow the link.
I would have liked to comment directly to ms Aloi on the HuffPost site, but frankly, giving HuffPost free access to all my information, including my address-book, is not something I want to do. Instead, I'm doing the next-best thing. I am writing my very own counter-rant on my own, crafty blog.

- - -

When I cut out a new pattern for sewing, I use my great-aunt's scissors. She was a seamstress, and kept both herself, her (unmarried) younger sister and their mother well provided for all her adult life by plying the needle and keeping the upper crust of her town well and fashionably dressed.
I have my mother's pincushion displayed in pride of place; she was a prolific writer in her scholarly field, and brought up a large brood of children, most of whom were not 'by her belly'.
I have my aunt's sewing-box and a good deal of her knitting-needles; she too was a tough, self-reliant female, who spent her life educating young mothers.

Coming from a line of bad-ass women, who did not need empty posturing to make themselves heard or seen, has - I must admit - given me a less than tolerant view of people (disregarding gender), who out of hand dismiss the lives of these women and the way they chose to express themselves at the end of the day.

I am a pastor, a university teacher, hold a ph.d. in a seriously scary scholarly subject, am the mother of two teens, and a wife, freind, neighbour and counsellor as well. I do not waste my time making perfunctory and juvenile statements about immaterial subjects (like super-heroes or vampires), I spend the time I call my own, by creating things that are beautiful to my eyes, and sharing them with my freinds all over the world.

I can wrap myself in one of my aunt's beautiful lace shawls, knitted in the evenings after long days of work, or lay out my mother's embroidered place-mats, or fold my great-aunt's beautiful, monogrammed white-work napkins, that are only used on special occasions, and when I do, I feel a deep connection to these women, just as I do when I cut out a pattern, put a pin in the pin-cushion or cast on a new pair of socks on my aunt's pins.

If you, ms Aloi, consider yourself a feminist, consider too, that being female and being a feminist, is not about being male. It is not about just turning the tables and showing male superheroes posing like female ones. It is about finding a voice. A voice and a place where you, as a woman, can be you, and are empowered.

Your voice - sadly - seems scornful, juvenile, narrow-minded and ignorant, just as you seem to be basing your evaluation of female worth on whether or not a given female is buying into the male way of expression. I do not need to reduce my life and my opinions in that way.

... and 'ignorant' ?
'The Killing' is not originally Swedish, it is originally Danish. And yes, there is a difference. I know the two countries are very close in many, many ways (just think of the myriad of wars that have been fought between them), but they are still not identical. Try looking both up on Google Maps or Wikipedia.

... and Jane Austen is one of the most brilliant authors of any age, whose elegant prose continues to run little circles around her readers, disregarding the subject-matter; it boggles my mind to think you can praise Buffy the Vampire Slayer and True Blood and not recognize the wicked, subversive brilliance behind a statement like this:
"The advantages of natural folly in a beautiful girl have been already set forth by the capital pen of a sister author; and to her treatment of the subject I will only add, in justice to men, that though to the larger and more trifling part of the sex, imbecility in females is a great enhancement of their personal charms, there is a portion of them too reasonable and too well informed themselves to desire anything more in women than ignorance."
J. Austen "Northanger Abbey" chapter 14

17 August 2011

Here comes the Sun(flowers) 5

SO, circular 4-patch in the centre, version 2. There is no green in the centre, and still the block reads 'too green' to my eyes.
And I think I have broken the 'code' on when I think a block is 'too green' : When the inner and outer triangle on the pieces for the 12" block are too alike, the block reads as 'too green' for me. Strange but true.
Well. At least I now know what to avoid :-)

And then Paula asked if these blocks will go into a big quilt. Well ... depends :-) Right now, I enjoy making them. I am trying to stick to a sort-of colourway (green for all outer triangles, pink-orange-yellow mostly for the inner bits, and in the fullness of time, I think (but haven't decided firmly yet), that they will be set on various blue backgrounds. How big the quilt will end up, all depends on how long I think it is fun to make them, experiment with colourplacement and the like. So : Yes, Paula, they will end up in a quilt ... eventually :-) But when and how big no-one knows.

On to the next one.

12 August 2011

Hybrid-piecing Hexagons


Hand-piecing hexagons is - for me - the natural way to do it.
Occasionally (rarely, but it happens) I get impatient and feel that I 'need' to move forward faster, and that is when machine-piecing comes into the picture.

BUT, machine-piecing hexagons seems to me to be a cruel and unusual way of doing hexagon-blocks. My sewing-machine and I like each other well enough - most of the time - but we are not on what you might call intimate terms, and me doing inset seams of any kind on the machine is not a sight to be soon forgotten (no matter how fervently you might wish that it was, and that your ears would stop burning)

Hybrid-piecing to the rescue !

Machine-piece the straight, not-inset seams, and then hand-piece the 'troublesome' inset seams. And because that sounds complicated (but isn't) here is a small description, with pictures.

I would like, at this point, to apologize for the quality of the pictures. I am not a professional photographer, and getting clear pictures when doing closeups like this, is - frankly - a bear to do. Know that I did it as well as I could. If you have trouble seeing how a picture could possibly illustrate the point I'm trying to make, double-click on it, and it will open 'on its own' in a (much) larger size.


Lay out your block (in this case, a double GFG-flower). I prefer to lay it out with the back up.
(and yes, eagle-eyed reader, there is a number on one of the hexagons. That is because it is printed from the CD. These hexies have been around for a loooong time)


Machine-piece into what might be called hexagon-strips.

Piece edge to edge (!)


When cutting the pieces apart, trim the thread on both sides, so that no ends 'stick out'. On the picture (right), you can see that one side of the seam has been trimmed, the other hasn't.
Trim them all.

Doing this means, that you can 'open' the seam when hand-piecing the strips together, but it still leaves just (!) enough thread to ensure that the whole seam doesn't unravel on you. If you feel iffy about having only 0.25" of thread-end between you and an unraveling seam, clip the thread a little bit further out, and then, with your needle, unpick one stitch at each end. You can do that while piecing.

If you want to press as you go, this is the point where you press the strips.
It isn't necessary, because the rest of your stitching will be by hand, so you can just leave well alone and press it all when the flower is finished. If you really want to press, press all seams the same way. Yes. Same way. It will work out and will press up a treat in the end.


Once all the strips for the flower has been machine-pieced, the hand-piecing part comes.
Since your pieces have been prepared with Inklingo, use a plain running-stitch.

At corners, take a backstitch, so you get both of two pieces anchored to the same match-mark on the single-piece (click on the picture if you have trouble seeing the back-stitch ... I do). Do not break the thread, but 'pass' from one hexagon to the next until the whole strip has been pieced.
Then move on to the next one.


When all the hexagon-strips have been joined, press your double hexagon flower.

It will press flat a treat, and all the intersections will open beautifully.


Requirements :
One of the (many) Inklingo 60-degree hexagon-collections.
1 flower-centre hexagon
6 inner-flower hexagons
12 outer-flower hexagons

Repeat as desired :-)

10 August 2011

Here comes the Sun(flowers) 4

SO. Double Sunflowers look good, but really ... 100 pieces to piece is a bit much sometimes. There has got to be something else I can do with the centre circle.

There is :-)

The collection comes with quarter circles, so ... maybe a circular 4-patch ? Worth a try, at least :-)
And this is the result. I sort-of like it. But I still think that the open space in the centre is too much.
Strangely, this one doesn't seem too green. It 'should', but it doesn't.

On to the next one ! Maybe without green in the centre ?

07 August 2011

Barbara Brackman's Civil War Sampler


Over at the Inklingo Sampler-blog, I'm following Barbara Brackman's Civil War sampler, and writing up printing-tables for the blocks. Brackman does hers in the 8" format, I do the ones at the Inklingo Sampler in a 6" format.
Occasionally, a block pops up, which doesn't really agree with me. Or with Inklingo. Either or both.
And one such, was the block for week 30, Peterson's Stars and Strips. Oh, the 'stripes' part is a piece of cake to make with Inklingo, just use the 1" Log Cabin collection, print 3 reds and 3 whites, and you're good.
The part that doesn't sit well with me is the applique'ed, 5-pointed star.
I don't do applique stars. Not if I can help it.
And yes, I have done'em. 5-point, 6-point, 8-point. And I'm not doing any more than I absolutely have to.
So, I didn't stitch the block. Just wrote up the printing-table, and made a link to a web-page with directions on how to make a 5-pointed star.
And then, a few days ago, I realized that the actual quilt, over which Brackman has constructed her block, does have applique'ed stars, but ... it also has a blue border with white stars.
So, here is my version.
It's a 6" block, and is very simple to make. You can make it 8" by adding some more strips, or by using the Inklingo 1" Log Cabin collection rather than the 0.75" collection I've been using for this block. What is important for this one is : red fabric, white fabric, and blue fabric with white stars.

Follow the link to download a printing-table for the 6" block.

03 August 2011

Here comes the Sun(flowers) 3

So, I didn't like the green-ness of the previous Sunflower.
New attempt. Inner triangles of the larger of the two Sunflowers are no longer green, but rather a light yellow. Same general colour-family as the diamonds.

I like that.
I have also begun to audition fabrics for the background, and I like the general idea of 'bright blue', hovering somewhere between cerulean (thank you, 'The Devil Wears Prada' for that term) and cobalt. Time enough to make a decision, though :-)

What I do not like, is the way the inner diamonds look on this one.
Lesson learned here : When making a Double Sunflower, the fabric used for the smaller (inner) diamonds should read as a solid (or almost solid), and not have a busload of interesting bits of pattern.

On to the next one !
I hope you can tell that I'm having fun :-)