Example : I want to make some small Broken Dishes blocks. For that, I need HST.
What is more, I would love to have them finish at 3", because then I can make them work with the 6" format that I mostly use for my block-experiments.
Now, to print a total of 8 HST, each 1.5" with Inklingo, I need a piece of fabric which is 5.25 x 5.5", BUT, I would so much like to use some (prewashed) 5" charms (which, after washing, are then more like 4.75 x 5").
Here's what I do :
 Cut the freezer-paper 5.5" square.
Set the printer's Custom-size to 5.5" square
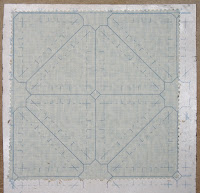
On the plastic-side of the freezer-paper, print the desired shape. In this case, 1.5" HST in Layout 1. Print it with colour 00. It really doesn't matter if you can see the actual print here. What is important is, that you can see the rulers that are on top of and to the left of the print proper.
(click on picture to see more clearly ... and yes, I can barely see the 00-colour print on this sheet of paper. I can, however, see the ruler-lines fairly clearly).
 Take the 5" square.
Position it so that it just (barely) covers the straight line of the printed (and visible) ruler. (again, click on picture if you have trouble seeing what I mean)
Iron in place.
IF your iron gets slightly gunky from this exercise, take a brown paper-bag (or another uncoloured piece of scrap-paper), place it over the edge of your ironing-board, and run the sole of your iron over the edge a few times. This will do away with most gunk on the sole of your iron (trick learned in clothes-construction class; it works when you want to remove remnants of fusibles like vlieseline or steam-a-seam from the sole of your iron).
 Print normally ! staying with the 5.5" user-defined / custom-size of setting.
As you can see, the fabric just (just !) covers enough of the print to give me both cutting- and stitching-lines for all 8 HST.
The general principle can be used with any (custom) size paper. Set your setting to the size paper you need, and you can (just) make do with a piece of fabric which is up to 0.5" smaller on one or both sides.
It is a particularly useful trick to do, when you - like the case is in this example - have a certain size pre-cut, and need just that teeny little bit more fabric to make it really work.

... oh, and my printed 5" charms ?
They are made into Broken Dishes and Pinwheel blocks, and I'm doing them as Leaders-Enders (thank you for the term, Bonnie Hunter)
And yes, in the fullness of time, there will be enough for a quilt :-)

... in the fullness of time :-)
2 comments:
Thanks so much for sharing the tip about printing the rulers on the shiny side! So very helpful in using those little scraps.
Missy in Missouri
Nice tute, Tilde! Very clear and well written. I'm going to try your version of this and print on the 'waxy' side... I was printing on the other side which is not as effective.
Thank you for all you do for us Inklingoists [even the lurkers, like me.] /; -)
Post a Comment